

This is our complete guide to buy web hosting from Namecheap in 2024 with a full detailed guide to get started with one of the affordable hosting providers around the globe offering budget-friendly hosting plans for all Namecheap users.
If you want to purchase web hosting plans and domain names from Namecheap then make sure to stick with the article, We’ll guide you through the steps for buying hosting from Namecheap also domain names with a step-by-step screenshot.
So without further ado… Jump right into the lists you” re interested in? Just use our handy table of contents.
What is NameCheap?
Namecheap is one of the affordable cheap hosting providers around the globe widely famous for domain registrars based in United States of America,
This web hosting company is also better to know for hostinger alternatives because they offer similar pricing plans but with different features and system performance models.
Namecheap has got a 4.57 rating out of 5 by 1.5+ customers so on in today’s date trusted by big brands such as Figma, Imgur, Buffer, etc.
Their cheap plan or basic comes with the pricing of $1.44per month with two years pricing model which is a saving of 50% than the monthly and yearly price model.
Here are some of the great features you can get with Namecheap plans:
- 100% Uptime guarantee
- You can easily add or remove your server resources or storage.
- Free website migrations completed by their expert team
- Easy WordPress and other software installations
- Free Supersonic CDN
- High Designs UI, UX dashboard
- An extra layer of security
- Premium and top-level domains at cheap pricing
- 30 days money back Guarantee
- 24/7 Live Support
- Free website builder
- Domain name and privacy protection
Namecheap is really a hand-saving hosting provider for non-budget-friendly customers who have very little cash to spend and want features like a premium hosting provider without spending so much cash. Anyone with small or big cash can get started with Namecheap.
All the hosting plans they offer in their platform are very super cashless friendly and anyone with almost low cash can build their very first own website.
One of the great things we found in name cheap is with their super affordable basic plans offers to host 3 websites with free domain name and CDN which is actually un-eatable close to rare.
We tested countless web hosting providers but Namecheap is just above the ranking for people with affordable pricing WITH great features that no one else offers with a similar pricing model
How to Buy Hosting From NameCheap 2024
1. Visit NameCheap.com
The first step in buying hosting from NameCheap is to visit their Namecheap platform using our link. After click on our partner link, you will land on their Namecheap hosting page.
Here is the screenshot of the landing page. Once you land on the Namecheap hosting page all you need to scroll a bit down and you will see their tabs with lots of products.
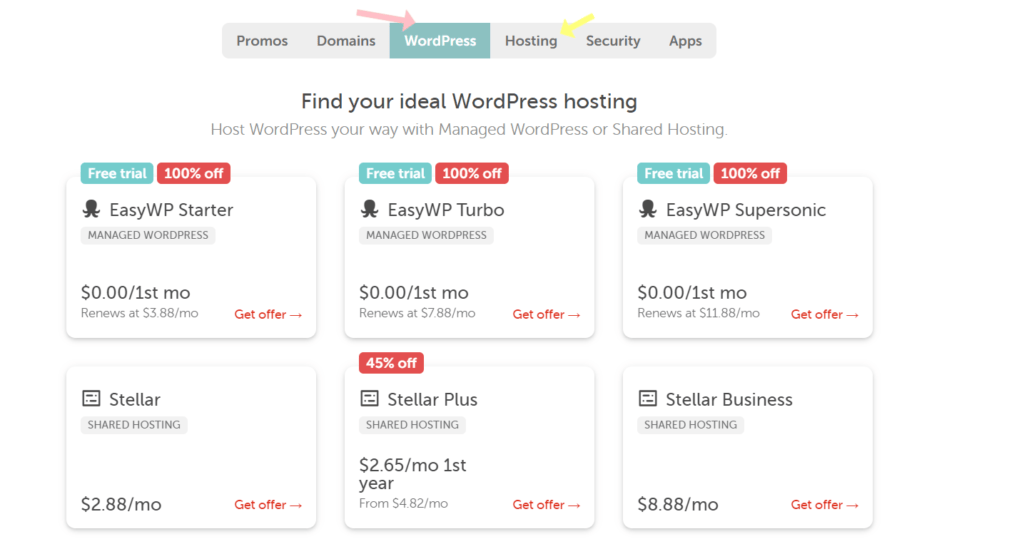
Here you can see the list of Namecheap products since we are going to purchase web hosting with Namecheap they offer two different servers.
If you are a wordpress user then you can go with wordpress if not then you can go with their hosting plans and install anything you want. If you go with wordpress plans you will get dedicated support from wordpress experts and their plans are also pre-optimized for wordpress users.
2. Choose NameCheap Hosting Plans
Once you decided on the server, now all you have is to click on the list and now you will land on Namecheap hosting plans. For this guide, we are going with their wordpress plans.
You’ll be on a page that shows three web hosting plans “EASY WP” Stater, Turbo, and supersonic.
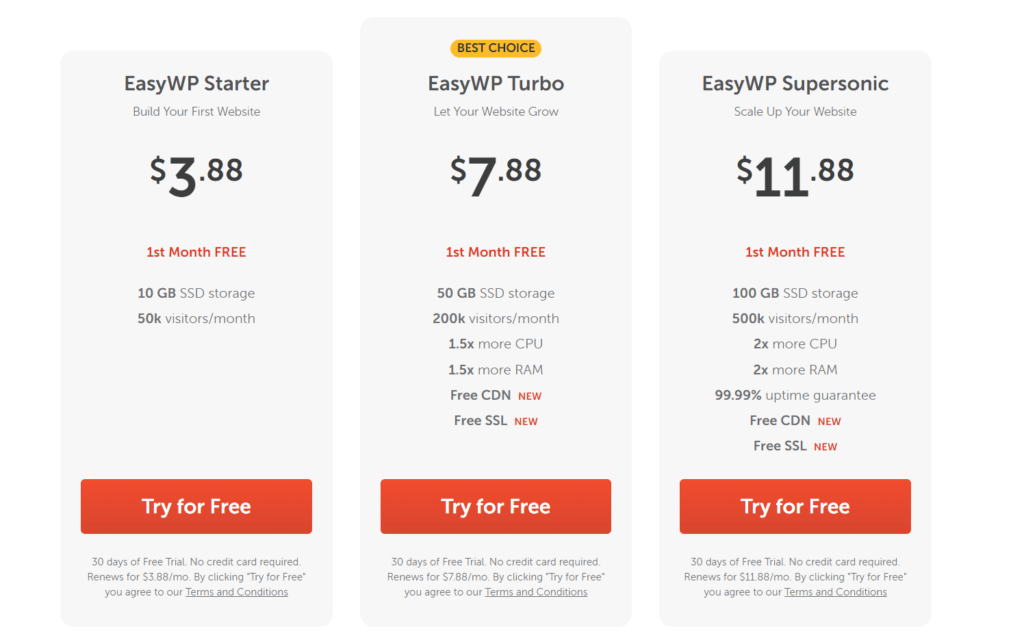
The good part is you can use each plan free for 30days with no credit card required that’s the best WP web hosting with free trials. With their all free plans, you can install wordpress in less than 90 seconds with no limitations of features with the trial.
Now you are clear to choose the plans. When you decided on the plans, you have to click on the orange button which says “Try for free” to move on a step further to buy hosting from the Namecheap provider.
3. Create Your NameCheap Account
After you click on the button you will be on the page where you have to signup or log in to get started with Namecheap plans.
This is how the page looks, if you already have an account then you can log in if not then you can directly signup.
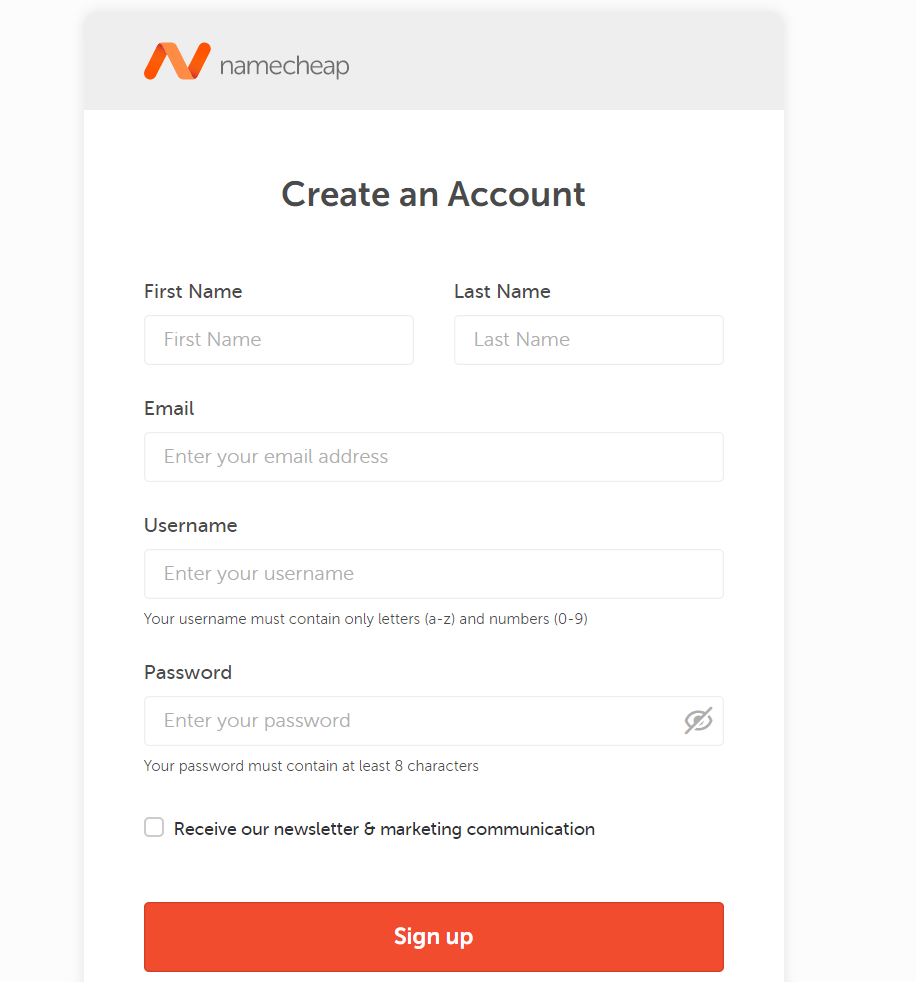
Put your genuine first and last name, make sure to add the correct Gmail or email address and put down your username you would love to call by Namecheap staff and system and in the last step fill up a strong password and click on the “Signup” button.
After clicking on the button, you will see this page where you have to confirm your purchase, you will not be charged for the next 30days until the trial ends.
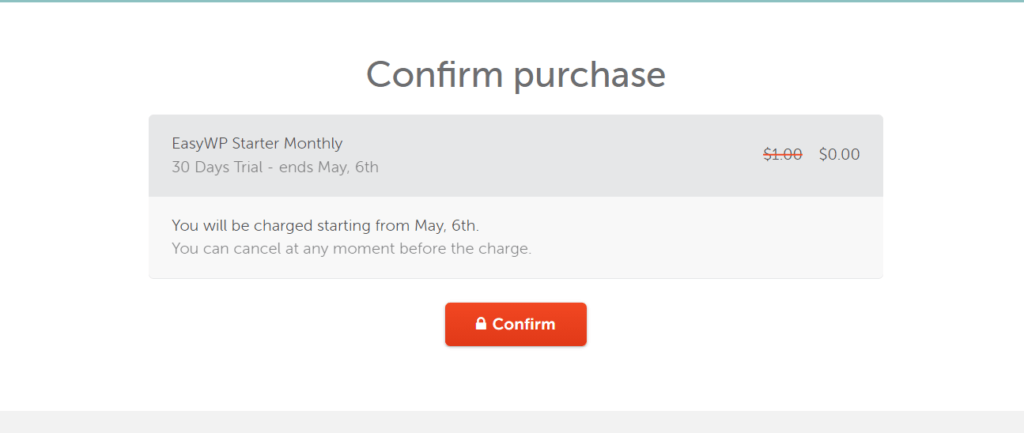
The good part is you can cancel the web hosting plans in a free trial to and you will have the same plan features that you will be getting after trial by paying cash so there are no limitations.
4. Enter Your Website name in the Namecheap panel
You’ll be on a page where you have to enter your website name and choose 3 categories for a better understanding of Namecheap so when you get a problem with your website their best matching dedicated support can help you to short out.

Once you choose your website name and categories all you have to click on the “Continue button”. For clear understanding, the website name is not a domain name. You are free to add any website name.
5. Choose Domain Name
Now you will be on a page where you have to choose their sub-domain offer by their system which is a subdomain that only applies if you have not a single domain name bought yet.
Let me explain.
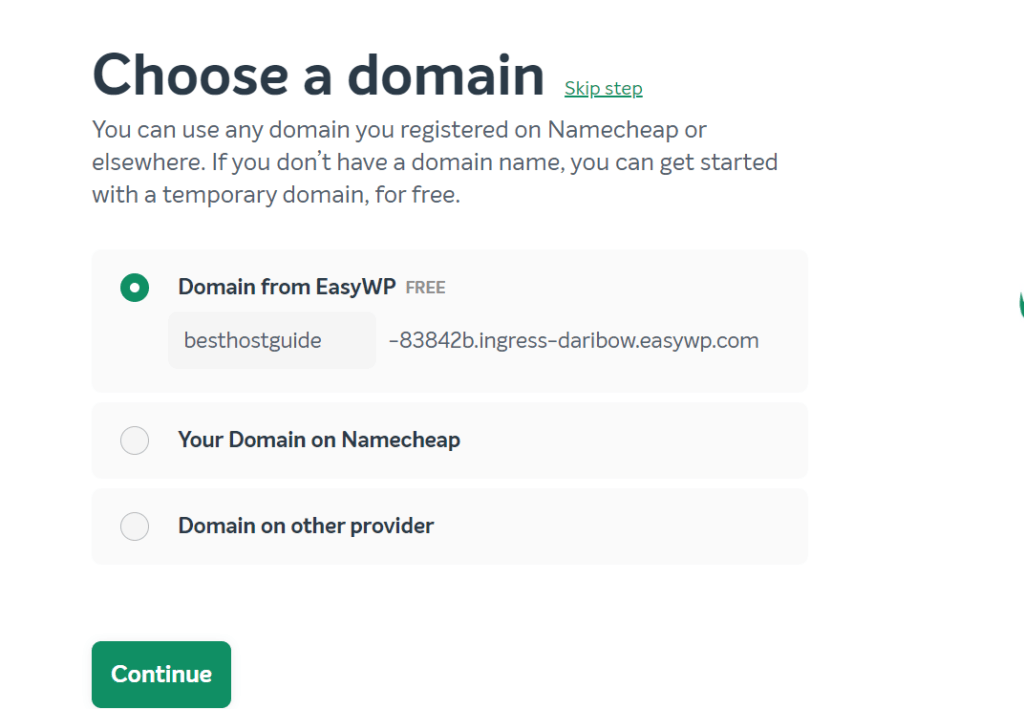
If you don’t have a domain name then you can use Namecheap temporary domain, for free which is best if you want to test their hosting servers and performance and support.
If not you can register the domain name first and follow our step from #1 to last so it will be easy for or you can open a new tab and register the domain name and once done put your domain name in the field.
If you already have a website and are currently hosted in other platform providers then you have to do nothing in these steps just click in continue. You will be able to add your old domain name after the successful creation of the Namecheap product plan.

Once you click on the continue button you will be on the next page where you have to choose plugins to get started with or you can skip. if you going to build your online store then make sure to install woocommerce where if you want to create your own website then install breezy websites builder and so on.
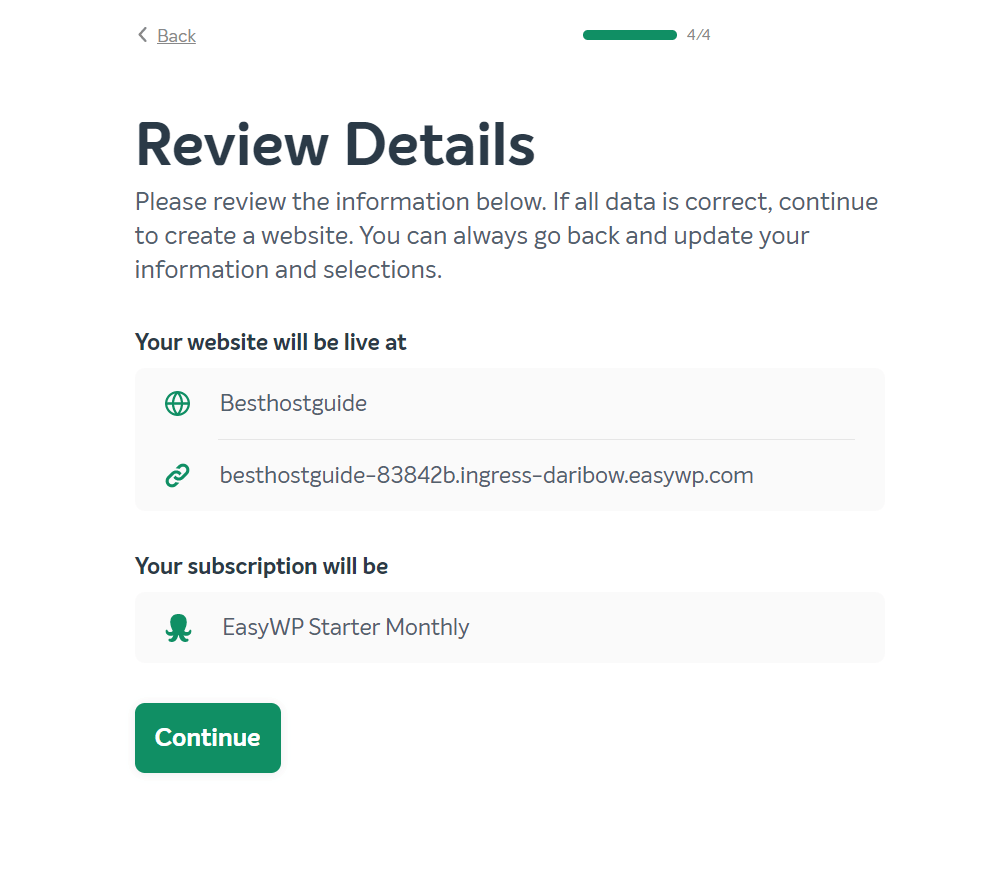
6. Review NameCheap details
The last step in our how-to buy hosting from Namecheap is to review your order and click on “CONTINUE BUTTON“. You no longer have to pay the cash until the trial period ends.
Once you click on continue you will land on their dashboard page which something looks these in today date,
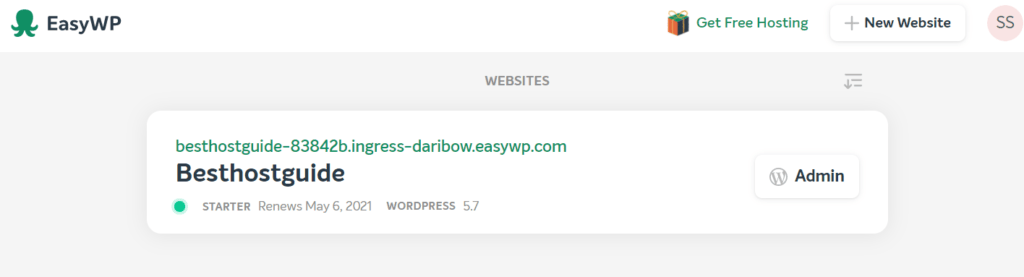
Once you follow all six steps congratulations now you have successfully purchased hosting from NameCheap. Now just click on the admin button with the wordpress icon so you can directly login into the wordpress panel without entering the password.
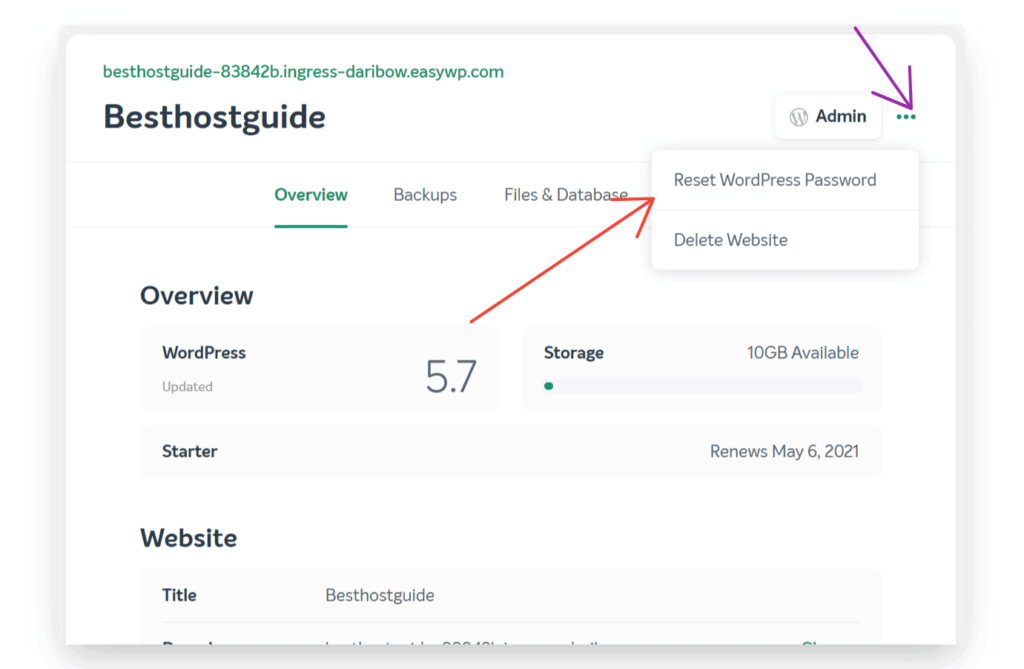
7. Change NameCheap WordPress Password
In order to change the Namecheap wordpress password just click on just click on the 3 small dots once you click you will see two options “
Just click on wordpress password in you will be on a page where you have to use your registered email address which you enter while signup in the Namecheap process for buying hosting with Namecheap (step#3).
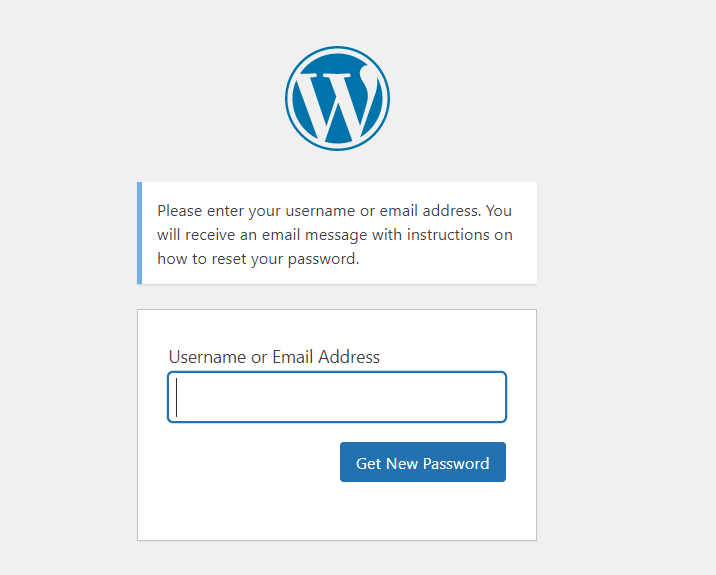
Use the registered email address or username then click on get the new password. Once down check your email account from where you can reset your password.
Final Words
Namecheap is the #1 top affordable hosting provider we found in our review. A better alternative to hostinger and HostGator offering so value-packed features that other host providers with similar pricing range that no one else offers.
We hope you found today’s article helpful and enjoyed the step guide on how to purchase hosting from NameCheap.
Now we want to hear from you! Did this article help you to figure how to buy hosts from NameCheap?
Other related “How to buy hosting” Guides