This is a complete guide to help you ” How To Install WordPress on Hostinger “, if you don’t know how to buy web hosting from Hostinger and install wordpress on it then this guide is totally for you.
So if you are looking for:
- how to install wordpress on a new domain in hostinger
- how to use wordpress on hostinger
- how to buy web hosting from hostinger
Then you”ll love this guide, i am going to share with you the beginner friendly step by step on how you can setup wordpress website with your hostinger’s account.
So without further ado… Jump right into the lists you” re interested in? Just use our handy Table of contents:
If you are still confused should yo go for hostinger or not and need some discounts then this all related article is for you:
- Detailed Hostinger Review: Why They’re A “Decent” Cheap Host?
- Hostinger vs NameCheap: 13 Test To Decide “Who’s Best”
- Hostinger vs HostGator – The Clear Winner “Review” Guide
- How To Buy Web Hosting From Hostinger| Full Beginner’s Guide
Now, without wasting any more time, let’s jump right into install wordpress on a new domain in hostinger.
how to install wordpress in hostinger Hostinger
Before getting started with auto installer on hostinger, the first thing you need to purchase Hostinger web hosting.
If you have not yet purchased Hostinger hosting then you can read our detailed article on how to buy web hosting from hostinger.
Once you purchased Hostinger hostinger, log in to your H panel and start following our all-important steps.
Step 1: Login Into Hostinger H Panel
The very first step on “how to install wordpress on new domain in hostinger” is to log-in to your hostinger hpanel.
Use the username and password that you recently created while purchasing web hosting from hostinger for yourself.
Once you log in hostinger panel, you will be on a page which looks something like this:
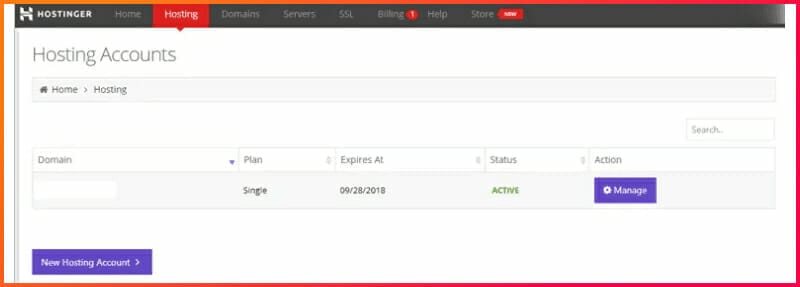
Now click on Manage button where you will find your all web hosting details with complete information and data.
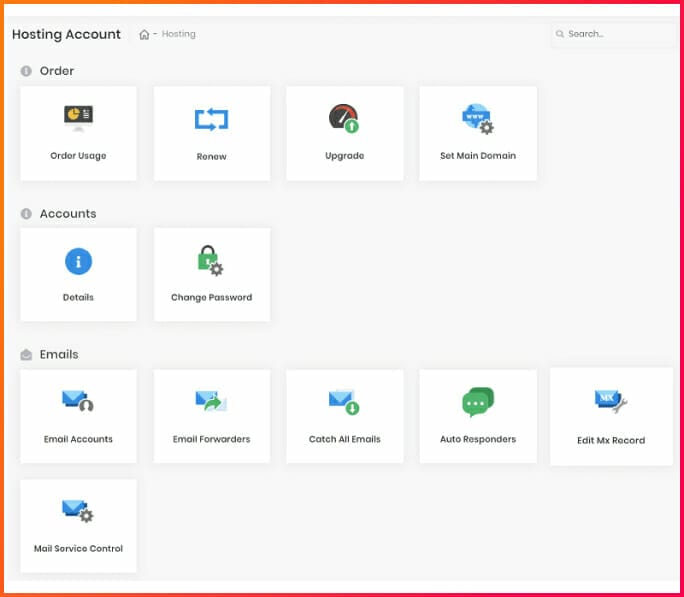
Once you click on the manage button you will be on Hostinger account from where you can control each element of your website.
Step 2: Search For Auto Installer
In order to install wordpress you can have to find out the website section or you can also search in panel from the search button panel.
You will find all the options and setting that are important for your website but in order to get those feature and setting live, first of all we have to install wordpress.
( See the image below)

Step 3: Search For WordPress
Now click on auto installer, you will be redirected to the auto installer web page form where you can install wordpress along with countless other CMS applications.
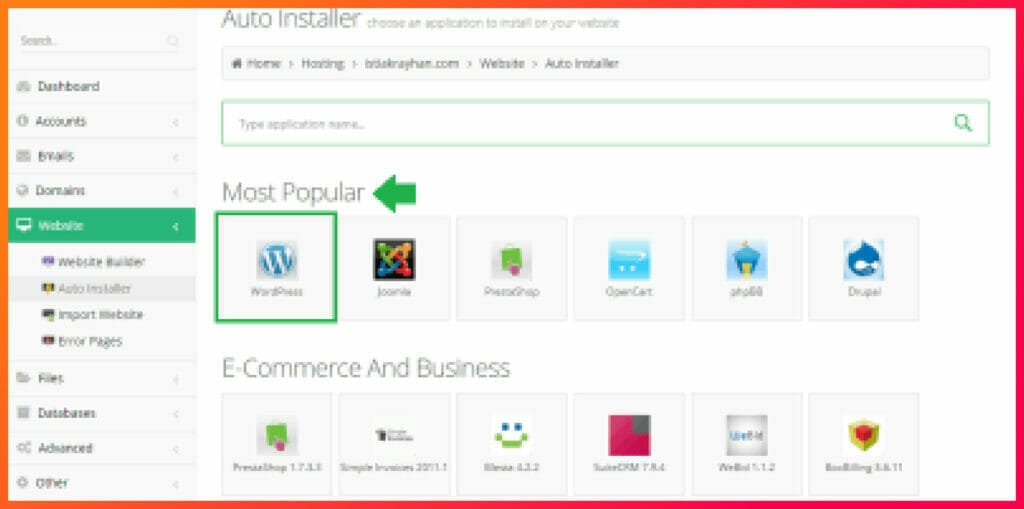
Now all you need to click on wordpress under the most popular section just click on it and then you will be on a page where you have to submit your website domain URL in which you want to install wordpress on it on your server.
Step 4: Put Your Website URL FOr WP Installation
In this section of how to install wordpress in hostinger, all you have to put the your domain name in which you want to install WordPress on it.
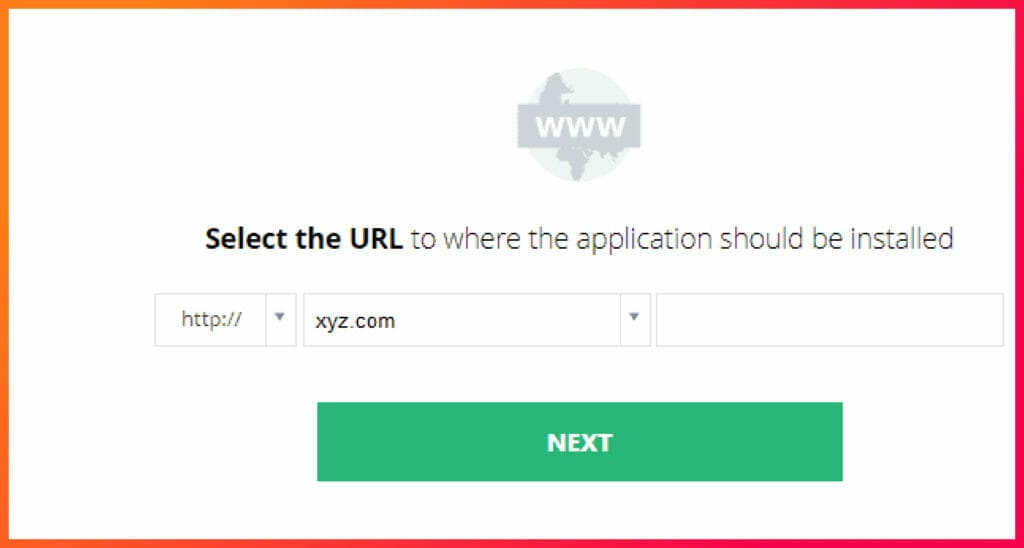
Tip: Make sure you use “HTTPS” so when you install wordpress, the hostinger team will install SSL for free for you without any issue. So make sure to choose the SSL version.
Now all you need to click on next button and you will be on a page where you have fill up your username, password and put email.
Step 5: Fill Up UserName, Password and E-mail
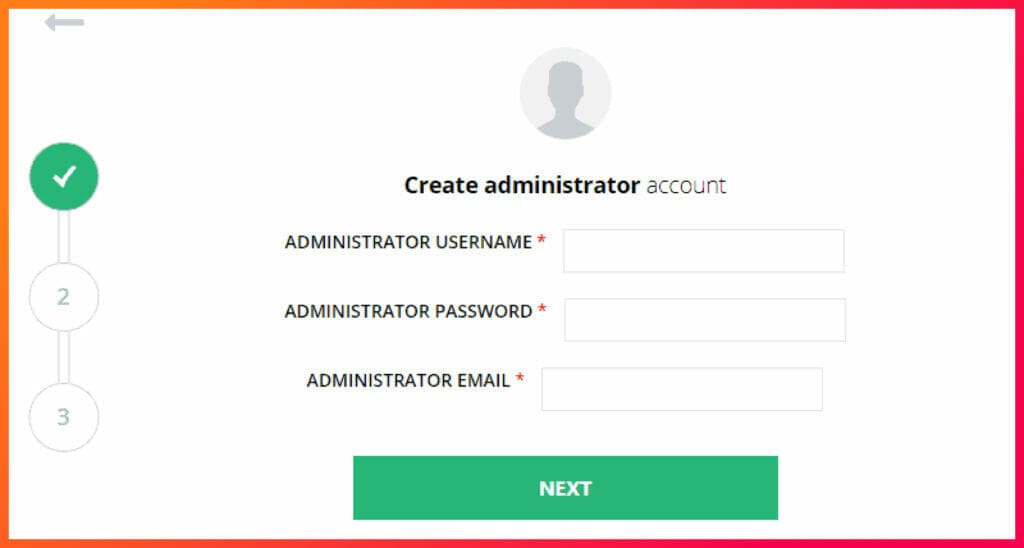
Now in this section you have to set up the admin username, password so next time when you log out from wordpress you can use the same username and password to log in as admin in your wordpress website.
Once done, now click on next button and best wishes your wordpress website is installed successfully on your server, and once done you will be on your wordpress admin page.
Bingo! Hurrah! All set.
That is how you can install wordpress on hostinger, with easy to guide with step by step. Now you can start working on your brand new wordpress website.
if you want to design the website the way you want then i highly recommended you go use elementor. If you want to learn more about Elementor website builder then click here.
Faqs:
How to install WordPress on new domain in hostinger
Here are the steps to install wordpress on new domain in Hostinger today:
- Step 1: Open Hostinger.com
- Step 2: Select a web hosting and purchase a plan.
- Step 3: Login to your h Panel account.
- Step 4: Find out Auto-Installer.
- Step 5: Put Your Website URL for WP Installation
- Step 5: Search for WordPress and install
Final Words
You’re done and thankyou for getting this far following each steps 🙂. That’s it you’re done with installing WordPress and many best wishes for your brand new website in new hosting Hostinger.
Now you can customize your business and do anything you love to do ultimately it’s your full 101% control.
I have shared with you the exact steps by step along with some powerful guide that will help you to choose and learn complete information about hostinger.
If you have any doubts and queries regarding hostinger and WordPress installation the feel free to write down in the comment section below and ask your questions and ask and doubts.
Thankyou : )


